Supplies needed:
Paint Shop Pro: I used PSP8 but all versions should work
Tube of choice. I used the awesome work of Keith Garvey which can be purchased HERE
Seachell_Canary Yellow scrap kit which can be found HERE . Please be sure to leave her some love.
Mask 2 by Suzzana which can be found HERE.
At bottom of first page, click on Next. The mask I used is the 3rd one down on that 2nd page.
Font of choice: I used A&S Snapper Script which is a pay font, so I can't share.
My Supplies: Animated Butterfly and canary. I received these through yahoo groups over the years. If these belong to you please let me know so I can give proper credit or remove if necessary. The canary in Seachell's kit couldn't be used because I wanted to get rid of the twig and her TOU allows no alteration other than resizing or colorizing.
I am providing the 2 gradients I used to make the tag. I made these myself.
Supplies can be found HERE
Ok, Let's get started:
Open your 2 gradients found in my supplies as well as your Zuz Mask2 in paint shop pro and minimize them.
Open your folder containing your scrap kit and minimize for easy access.
Open new image 600X600. Flood fill with white
Open Seachell_Yellow_Element22 frame. Duplicate and close the original.
Resize the frame by 75% , adjust sharpness/sharpen. Copy and paste as new layer on your working image.
Using your selection tool, set to rectangle, draw a box around the entire inner area of frame...including half the depth of the frame as shown in image below.
Once area is selected, highlight raster one (your background layer) in the layer pallet.
Create new raster layer. With the new raster layer highlighted select your flood fill tool, and then in the color pallet, look under the textures tab, scroll to the top and find Canary Yellow Diva Gradient. Click on it, and then OK.
Click inside the selected area on your tag and flood fill. Now lower the transparency of this layer to around 66. DO NOT DE-SELECT. Open your tube of choice. With the flood filled layer you just created highlighted, paste your tube as new layer. Position (see my tag for reference). Once positioned the way you like, duplicate the tube layer and move the duplicate above the frame in the layer pallet. Hide this duplicate for now.
Highlight the original tube on the layer pallet. The go to selections/invert and then hit the delete button on your keyboard. That will get rid of everything outside the frame.
De-select. Add drop shadow of choice. The settings I used were 2, 2, 45, 4 black, and then repeated with -2, -2, 45, 4
Unhide your duplicate tube layer and erase the parts that show outside the frame, ONLY at the bottom. If you use the same or similar tube to the one I have, and want the hand to show outside the frame, you'll need to erase carefully around the hand. I lowered the transparency of my tube layer so that I could see the frame underneath which allowed me to erase everything that showed over the frame.
Open up Seachell_Yellow_Element 31. Duplicate and close original. Resize 75%.
Highlight your frame layer in the layer pallet, then paste as new layer. You'll need to use your deform tool to position the beaded frame on top of the first frame. Once happy with the positioning. Use your eraser tool to erase the parts that show above the flowers and the little white tag on the original frame (see my tag for reference). I also selected the white beads with my free hand selection tool and colorized to match my tube. That part is optional to your taste.
Drop shadow this layer, and the original frame layer using same settings as above.
Open Seachell_Yellow Element28, Duplicate and close original. Resize to 25%. Adjust/ sharpness/sharpen.
Now, we need to adjust the color a bit. I did this by going to adjust/brightness and contrast with the settings 36 and 18. Click OK.
Copy and paste your flower onto your working image. position at the top right corner (see my tag for reference) Drop shadow using same settings above.
Open Seachell_Yellow Element27, duplicate and close original. Resize to 20%. Adjust/ sharpness/sharpen. Copy and paste onto your working image. Drop shadow, using same settings used above.
This flower will be used to make a flower frame which will be placed beneath your original frame...so you'll need to duplicate the flower until you have enough to form your frame. Arrange around your frame where they slightly overlap each other. When positioning them, you'll need to space them to where only half of the flowers will show outside the original frame. See my tag for reference. You want the flower frame you're creating to peak out from under the original frame and the other half with the yellow centers to show through your frame bkg. Once positioned correctly, merge all the white daisy layers ONLY. Once you have them all merged, drag this layer down under your original frame in the layer pallet.
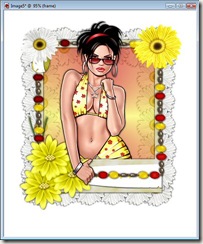
Your tag should look like this so far:
Open the yellow canary provided in my own supplies. Copy and paste as new layer and position on top of the yellow flower cluster. Drop shadow with settings above.
Time to add our mask now.
Highlight the bottom layer on the layer pallet. Create new raster layer.
With new raster layer highlighted, flood fill with a color to match your yellow flowers.
Apply Zuz Mask 2 which you should have minimized in psp. To apply the mask this way, go to Layers/New Mask Layer/From Image. Look in the drop down box and find the Zuz Mask2. Click on it to choose and use settings below and click ok.
Delete the mask layer on the layer pallet, and merge group.
Now, add your copyright info and Your name. If you wish to use the same colors for your name as I did, When setting the color for your font, look in the color pallet in textures and on the drop down list scroll to the top and find Canary Yellow Diva Name Gradient and click ok. Type out your name and position. I used Eye Candy 4000 and added a gradient glow using the following settings (optional)
Once your name and copyright info are added, crop excess white background if you need to.
To animate......copy merged and paste into Animation Shop.
You need to duplicate this frame till you have a total of 8 frames.
Open the animated butterfly from my supplies.
Click on the first frame of the butterfly animation then go to Select/Select All/Copy
Now, click on the first frame of your tag you copied over from paint shop pro and go to Select/Select All/Paste Into Selected Frame, and paste the butterfly where you want it on your tag.
Resize if necessary and save your tag to your computer and you're all done!
Thanks for trying my tutorial. I would love to see your results.
TOU:
This tutorial is my own creation. Feel free to use for tutorial challenges but do not copy any parts of the tutorial. To use for challenges, simply copy and paste a link to my blog.


No comments:
Post a Comment