Saturday, 3 October 2009
I'm So Sorry!
I'm so sorry that the collaboration kit that I promised hasn't been posted.
My friend Dawn, who does collaborations with myself and Kaci, had a tragic and sad occurence in her family awhile back. Her Brother-In-Law was killed in action in Afghanistan. Please keep his wife and the rest of his family in your prayers.
I'm hoping that soon I'll be able to get a few more things done to share with you.
Saturday, 1 August 2009
NEW COLLABORATION KIT COMING
The kit would have been up already but there've been some things going on that have delayed it a bit. Real life dictates
Hoping to have it up soon for you...so keep checking back
Tuesday, 7 July 2009
Fireworks at Jackson Park, Hendersonville, NC July 4th, 2009 Video by Andy - MySpace Video
Shared via AddThis
This video was taken by son Andy this 4th of July in our hometown of Hendersonville, N.C
Saturday, 4 July 2009
Another New Tag
Friday, 3 July 2009
4th of July Collaboration Kit
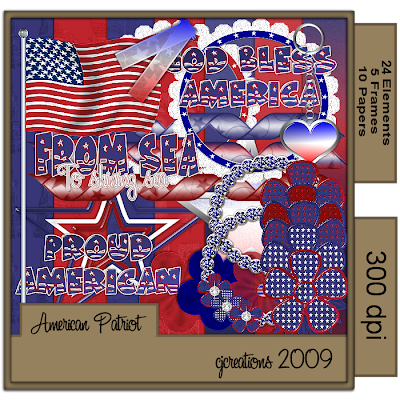
click image to view full size.
My friends Dawn, Kaci and I have been working on a patriotic collaboration kit for you all, and have finally finished all parts and it’s now ready to share.
Above is a preview of my part of the Collaboration, with a download link below the preview. I hope that you’ll enjoy using the kit, and we’d all love to see what you create with it. Pick up my part HERE
You can find Dawn's part of the kit HERE
And Kaci's part HERE
Thursday, 2 July 2009
Friday, 19 June 2009
Patriotic Cluster Frame Freebie
I’ve been playing around with a few scrap elements for July 4th and thought I’d share them here with you all. Please be gentle as I’m still very new to all of this. I hope someone’s able to make use of them. Today I have a Patriotic cluster frame to share.
If you like it, you can pick it up HEREMonday, 15 June 2009
Wednesday, 27 May 2009
BABY YOU’RE A STAR
SUPPLIES NEEDED:
Tube of choice: I am using the wonderful artwork of Ted Hammond His tubes can be purchased at CILM
Star Word Shape which can be found at Misfits Scrapz Thank you Yvette for this wonderful share.Filters Needed: DSB Flux Bright Noise and Eye Candy Gradient Glow
Mask: I used a beautiful Mask By Vix which is included in my supplies. You can find many more masks at her site HERE Thank you Vix!
Also included in my SUPPLIES is my own word art.Let’s get started:
Open new image 700 X 700. We can resize later.Flood fill with white.
Copy and paste Yvette’s CU Star word shape as a new layer
Colorize to match the tube you plan to use.
Activate your shape tool, set to Star 2 shape with the following settings
Choose a color to match your tube for your foreground color and background color set to nil (hidden or closed off).
Draw a star shape large enough to frame your word shape. Stretch it out till none of the word shape shows outside your frame. Convert to raster layer.
Hide the star word art in your layer pallet. With Star Frame layer highlighted, activate your magic wand, tolerance set to zero, and click inside your frame, selecting the center area. Modify/expand by 10.
Create a new raster layer under the word art layer. Flood fill with color of choice. I used white. DESELECT
Highlight your star frame layer again and go to Effects/3D Effects/Chisel and apply using the following settings. Color set to a contrasting color to match your tube

Still on the star frame layer, click inside the original star frame (the part you had before applying the chisel effect) selecting that part only.
Leaving selected, duplicate this frame layer two times, giving you 3 star frame layers.
Hide the two duplicates for now and on the original frame layer apply Effects/Plug-ins//DSB Flux/Bright Noise with the following settings:

Hide the original frame layer and apply the same effect to the 2nd frame layer, but apply twice this time.
Hide this layer and apply the effect 3 times to the 3rd frame layer. Hide both duplicate frames, and unhide the original for now.
Copy and paste your tube as a new layer above the frame and position.
With your white background layer highlighted, new raster layer and flood fill with color of choice. Apply your mask. Delete mask layer and merge group. Resize layer to 85% and change transparency to about 30%
Add my word art, your copyright information and your name. I used A&S Black Swan which is a PTU font which I can’t supply for my name.
Crop or resize if necessary.
ANIMATION:
Copy and paste merged into animation shop as a new image. Back in PSP hide the original frame layer and unhide the first duplicate frame. Copy merged and paste into animation shop AFTER current frame. Back in PSP again, hide the 1st duplicate frame layer and unhide the 2nd duplicate frame. Copy merged and back in Animation shop, select the 2nd frame and paste after current frame and save your tag.
Thank you for trying my tutorial. If you try it, please leave me a comment.Tuesday, 26 May 2009
TEEN LOVE
Supplies needed:
5 Tubes of choice. I am using the gorgeous artwork of Jamie Kidd. Her website is HERE and her tubes can be purchased at CILM
Teen Love SWA Exclusive scrap kit by Missy and Tammy which can be purchased
from Scraps With Attitude Thank you for the awesome kit Missy and Tammy
Mask of choice. I am using one called reginaredhearts but I have no idea where the mask came from,
so therefore am unaware of the TOU.
My supplies: The Mura word layer needed which you can grab HERE
Must have a working knowledge of PSP to continue.
OK, let’s begin:
Open the folders containing your supplies and minimize them till needed.
Open new image 700X700. We can crop and/or resize later. Fill canvas with white.
In your scrap folder you will find several subfolders. Some are Tammy’s part of the kit and others are Missy’s.
In Tammy’s papers folder. Find Paper 6. Duplicate it and close the original. Resize your duplicate to 700 X 700 pixels, copy and paste as new layer. Apply mask of choice to your paper layer, delete mask and merge group. Resize your mask layer 85%.
Open Tammy’s elements folder 1, Open Frame 6, duplicate and close original. Resize frame 20% then copy and paste as new layer above your mask layer on the tag we’re making.
Hide your mask layer in the layer pallet , then highlighting the frame layer, use your magic wand and select the area inside the frame. Modify/Expand by 8, click OK. Unhide the mask layer. You may want to rearrange the mask layer to suit. Leave selected
With your mask layer highlighted, open Missy’s paper folder and find Paper 11. Duplicate and close original, then resize to 700X 700 pixels. Copy and paste as new layer. With new paper layer highlighted go to Selections/Invert/delete. Now go to selections/Invert and leave selected still.
In My Supplies folder open the Mura copies layer. Copy and paste as a new layer above the paper layer we just did. Line up the words to suit then Selections/Invert/Delete/Deselect. Drop shadow of choice to the frame.
In Missy’s Elements folder open ribbons 2, 3 and 4. Duplicate each one and close originals. Resize each 20%. Adjust sharpness/Sharpen. Copy and paste on top of each other at the top right of your tag we’re creating. See my image for reference. I mirrored my yellow ribbon before arranging with the other two. Once happy with the positioning, drop shadow of choice to each ribbon and then merge the three of them together. Duplicate your ribbon layer and mirror. Position like in my image above.
In Tammy’s Elements 1 folder, open Button3. Duplicate and close original. Resize duplicate 30%, Sharpen, copy and paste as new layer. Arrange on top of one of the ribbon clusters. Add drop shadow of choice, duplicate and mirror the duplicate. Position on top of the other cluster.
Open your tube of choice. Copy and paste as new layer, making sure it is the top layer. Position to where the bottom of your tube lines evenly inside the frame. See my image for reference. Drop shadow.
Open Tammy’s Elements1 folder again. Find filmstrip 3. Duplicate and close original. Resize 40%. With top layer on the tag you’re making highlighted, paste the film strip as new layer and position like in my image above.
Hide all layers except the filmstrip layer. Using magic wand, tolerance set at 0, click inside each of the parts of the film strip. Modify/expand by 2. Flood selections with either a paper of your choice or a colour. I used #B9B9B9. Once filled, deselect, and then using magic wand, click inside just the first section, modify, expand by 2. Copy and paste your tube of choice as new layer. Position and selections/invert/delete/deselect. Do the same for the remaining 3 sections. Once all tubes sections have been done, add drop shadow to your face layers.
With filmstrip layer highlighted, add a gradient glow. I used the following settings
Drop shadow your filmstrip.
Add your copyright information and your name. Resize/crop if necessary.
If you choose not to animate you’re all done.
ANIMATION:
Ok, this is a bit detailed so read carefully. On your layer pallet, find the paper you used for the frame background. With that layer highlighted, copy. Open Animation Shop and paste as new image.
Go to Effects'/Insert Image Effects and from the effects drop down box choose ROTATE COLORS. I used the settings below.
This should leave you with 5 frames in your animation. I deleted frames 4 and 5 which left only the 3 colors I’d used of the ribbons.
Next, go back to PSP and hide all layers except your white background layer and your mask layer. Copy merged bkg/mask layer and paste as new Image in animation shop. Clicking inside your new image, duplicate selected frame twice, leaving you with a total of three frames.
Back to the rotating colors animation we made. Clicking in the first frame go to Edit/Select All/Copy. Now, highlighting your background mask image, click inside the first frame of it, and Edit/Select All/Paste into selected frame. Now you should have the color change animation and the background and mask together in one animation.
Now, back to PSP. Hide the mask and white background layers, and unhide all the others. Copy merge and then paste into animation shop as a new image. Duplicate twice giving you three frames again. With first frame highlighted, Edit/Select All/Copy. Highlight first frame of our merged animation we made, Edit/Select All/Paste into current frame. Carefully position into place so that the frame fits properly over the color changing background.
One last step before saving. On your final animated tag, with the first frame highlighted, Edit/Select All/ Then right clicking in that first frame choose Frame properties and set to 75 and click ok. Now save your tag and we’re all done.
Thank you for trying my tutorial
Sunday, 10 May 2009
CANARY YELLOW DIVA
Supplies needed:
Paint Shop Pro: I used PSP8 but all versions should work
Tube of choice. I used the awesome work of Keith Garvey which can be purchased HERE
Seachell_Canary Yellow scrap kit which can be found HERE . Please be sure to leave her some love.
Mask 2 by Suzzana which can be found HERE.
At bottom of first page, click on Next. The mask I used is the 3rd one down on that 2nd page.
Font of choice: I used A&S Snapper Script which is a pay font, so I can't share.
My Supplies: Animated Butterfly and canary. I received these through yahoo groups over the years. If these belong to you please let me know so I can give proper credit or remove if necessary. The canary in Seachell's kit couldn't be used because I wanted to get rid of the twig and her TOU allows no alteration other than resizing or colorizing.
I am providing the 2 gradients I used to make the tag. I made these myself.
Supplies can be found HERE
Ok, Let's get started:
Open your 2 gradients found in my supplies as well as your Zuz Mask2 in paint shop pro and minimize them.
Open your folder containing your scrap kit and minimize for easy access.
Open new image 600X600. Flood fill with white
Open Seachell_Yellow_Element22 frame. Duplicate and close the original.
Resize the frame by 75% , adjust sharpness/sharpen. Copy and paste as new layer on your working image.
Using your selection tool, set to rectangle, draw a box around the entire inner area of frame...including half the depth of the frame as shown in image below.
Once area is selected, highlight raster one (your background layer) in the layer pallet.
Create new raster layer. With the new raster layer highlighted select your flood fill tool, and then in the color pallet, look under the textures tab, scroll to the top and find Canary Yellow Diva Gradient. Click on it, and then OK.
Click inside the selected area on your tag and flood fill. Now lower the transparency of this layer to around 66. DO NOT DE-SELECT. Open your tube of choice. With the flood filled layer you just created highlighted, paste your tube as new layer. Position (see my tag for reference). Once positioned the way you like, duplicate the tube layer and move the duplicate above the frame in the layer pallet. Hide this duplicate for now.
Highlight the original tube on the layer pallet. The go to selections/invert and then hit the delete button on your keyboard. That will get rid of everything outside the frame.
De-select. Add drop shadow of choice. The settings I used were 2, 2, 45, 4 black, and then repeated with -2, -2, 45, 4
Unhide your duplicate tube layer and erase the parts that show outside the frame, ONLY at the bottom. If you use the same or similar tube to the one I have, and want the hand to show outside the frame, you'll need to erase carefully around the hand. I lowered the transparency of my tube layer so that I could see the frame underneath which allowed me to erase everything that showed over the frame.
Open up Seachell_Yellow_Element 31. Duplicate and close original. Resize 75%.
Highlight your frame layer in the layer pallet, then paste as new layer. You'll need to use your deform tool to position the beaded frame on top of the first frame. Once happy with the positioning. Use your eraser tool to erase the parts that show above the flowers and the little white tag on the original frame (see my tag for reference). I also selected the white beads with my free hand selection tool and colorized to match my tube. That part is optional to your taste.
Drop shadow this layer, and the original frame layer using same settings as above.
Open Seachell_Yellow Element28, Duplicate and close original. Resize to 25%. Adjust/ sharpness/sharpen.
Now, we need to adjust the color a bit. I did this by going to adjust/brightness and contrast with the settings 36 and 18. Click OK.
Copy and paste your flower onto your working image. position at the top right corner (see my tag for reference) Drop shadow using same settings above.
Open Seachell_Yellow Element27, duplicate and close original. Resize to 20%. Adjust/ sharpness/sharpen. Copy and paste onto your working image. Drop shadow, using same settings used above.
This flower will be used to make a flower frame which will be placed beneath your original frame...so you'll need to duplicate the flower until you have enough to form your frame. Arrange around your frame where they slightly overlap each other. When positioning them, you'll need to space them to where only half of the flowers will show outside the original frame. See my tag for reference. You want the flower frame you're creating to peak out from under the original frame and the other half with the yellow centers to show through your frame bkg. Once positioned correctly, merge all the white daisy layers ONLY. Once you have them all merged, drag this layer down under your original frame in the layer pallet.
Your tag should look like this so far:
Open the yellow canary provided in my own supplies. Copy and paste as new layer and position on top of the yellow flower cluster. Drop shadow with settings above.
Time to add our mask now.
Highlight the bottom layer on the layer pallet. Create new raster layer.
With new raster layer highlighted, flood fill with a color to match your yellow flowers.
Apply Zuz Mask 2 which you should have minimized in psp. To apply the mask this way, go to Layers/New Mask Layer/From Image. Look in the drop down box and find the Zuz Mask2. Click on it to choose and use settings below and click ok.
Delete the mask layer on the layer pallet, and merge group.
Now, add your copyright info and Your name. If you wish to use the same colors for your name as I did, When setting the color for your font, look in the color pallet in textures and on the drop down list scroll to the top and find Canary Yellow Diva Name Gradient and click ok. Type out your name and position. I used Eye Candy 4000 and added a gradient glow using the following settings (optional)
Once your name and copyright info are added, crop excess white background if you need to.
To animate......copy merged and paste into Animation Shop.
You need to duplicate this frame till you have a total of 8 frames.
Open the animated butterfly from my supplies.
Click on the first frame of the butterfly animation then go to Select/Select All/Copy
Now, click on the first frame of your tag you copied over from paint shop pro and go to Select/Select All/Paste Into Selected Frame, and paste the butterfly where you want it on your tag.
Resize if necessary and save your tag to your computer and you're all done!
Thanks for trying my tutorial. I would love to see your results.
TOU:
This tutorial is my own creation. Feel free to use for tutorial challenges but do not copy any parts of the tutorial. To use for challenges, simply copy and paste a link to my blog.
Saturday, 9 May 2009
My latest creation

Just thought that I'd show off my latest creation. I've used the gorgeous art of Scott Blair which can be purchased at MPT
Scott's own website can be found HERE
and the gorgeous template #26 made by Karla at Locarolita's Designz
Thank you Karla for sharing this beautiful template for us all to use.
HUGS
Wednesday, 6 May 2009

Please, if you're a Christian, join the millions who will be joining in prayer for America tomorrow May 7,2009 America's National Day of Prayer
http://www.ndptf.org/
Sunday, 3 May 2009
Our Ireland Pictures
In our travels around Ireland, Mick and I have taken so many pictures of all the breath taking scenery around the country, and I thought I’d start sharing my little animated slide shows with a few of the pictures at a time.
Sit back and enjoy the little journey to magical Ireland
Modern Girl
Supplies Needed:
Tube of choice. I am using the gorgeous art of Keith Garvey, you can purchase a license to use his art HERE Blue Dreams Scrap Kit I Am a Modern Girl which you can find HERE and WSL Mask 220 which you can find HERE
I used the filters….
Penta.Com Color Dot,
Penta.com Dot and Cross and Eye Candy 4000
All of which are optional.
My Supplies which includes my diamond frame topper.
You can find HERE
Now, let's get started!
Open up your folder containing your scrap kit, then just minimize so that it's ready for you.
Open the diamond frame topper from my supplies,
then duplicate and close the original.
Open new image 700 x 700 pixels. Flood fill with white
Open your scrap kit and find BD-I am a modern girl-Paper8.
Copy the paper and paste as new layer.
Apply your mask and merge group.
I resized mine 105%.
Next apply your filter Penta.com/color dot (optional)
I used the following settings:
Change the transparency on mask layer to 78%.
Now, find BD-I am a modern girl-Frame5.
Copy and paste as new layer, above your mask layer.
Hide the mask layer for now, and using your magic wand,
click inside the frame, being careful to choose the area below the ribbon wrap as well.
(In some versions of psp you must hold the shift key down to select more than one area).
Once both areas are selected, Selection/Modify/Expand by 5 and click ok.
Open BD-I am a modern girl-Paper7 and paste as a new layer directly under the frame.
Selections/Invert/Delete
On this new paper layer apply filter Penta.com Dot and Cross with settings below
Unhide mask layer.
Next, open up your tube of choice and paste as new layer, between the frame and mask layers.
Position to your liking then duplicate this layer, and move the duplicate tube above the frame on the layer pallet. Hide duplicate for now
Back to original tube layer.
Making sure this layer is highlighted in the layer pallet, Selections/Invert/Delete to get rid of any of the tube showing outside frame.
Apply drop shadow of choice. I used 2 2 40 4 and then -2 -2 40 4.
Highlight your duplicate tube layer now (your top layer).
Using your eraser tool, erase all of the tube that is covering the bottom part of the frame and the frame wrap.
Once happy with the way it looks, highlight the frame layer and add drop shadow of choice.
Now's the time to add the diamond frame topper and carefully position on top of the frame and then add other elements of choice.
Drop shadow each one, then add your name and copyright information.
Crop and/or resize to taste.
Now, if you want to animate your tag like mine.....
highlight the diamond frame topper layer and duplicate it twice
(making a total of 3).
Close off the two copies for now and highlight the original frame topper.
Go to plug-ins/DSB Flux/Bright Noise and apply the following settings.
Hide this layer and unhide duplicate1 of diamond frame topper.
Apply the filter to this layer as well with same settings.
Then repeat for a 2nd time.
Hide this layer now and unhide duplicate2 of diamond frame topper.
Apply the bright noise setting three times to this layer.
Hide layer.
Unhide the original diamond topper layer.
Copy merged and paste into animation shop
as new animation
Back to PSP and hide original topper layer and unhide the 1st copy layer. Copy merged.
Back to animation shop, right click on frame you had already copied over, and choose paste after current frame.
Then back to psp and hide 1st copy of topper, and unhide the top copy. Copy merged.
Back to animation shop
Highlight 2nd frame, right click and paste after current frame.
All done now, so just save your finished tag to your computer.
I would love to see your creations if you use my tutorial.
My Very First Tutorial
I hope that you'll find it easy to understand and follow.
Thursday, 30 April 2009

One of my latest patriotic tags. This was made using the awesome tutorial
Amercan Made which can be found HERE

I just received this awesome award from Dawn at
http://dawnsartisticcreationzandramblings.blogspot.com/
Thank you so very much Dawn for my newest award..I'm very honoured.
Love ya bunches!
The rules of this award is to place it on your blog along with the name and link to those who have given you the award and pass it on to 10 other blogs that you think are magically. Sorry if this is a repeat for anyone.
Wanda at:
http://bluedreamdesigns.blogspot.com/
Bel Vidotti:
http://lafleurstuffs.blogspot.com/
Deb at:
http://thescrappincop.blogspot.com/
Bethany at:
http://elegantwordart2.blogspot.com/
http://www.deliciousscraps.com/
Linda:
http://bonscrapatitdesigns.blogspot.com/
Harley:
http://dreamgirlproductionz.blogspot.com/
Siobhan
http://siobhans-blog.blogspot.com/
Chelle
http://weescotslasscreations.blogspot.com/
Anne
http://chicasdesignz.blogspot.com/
Wednesday, 29 April 2009
Thursday, 23 April 2009

I started working on this tag today, and had planned to make a tutorial for it.
The beautiful kit I used is "I Love Mom" by Karla at
http://lacarolitasdesignz.blogspot.com/
It ended up being a tribute to my Mom who passed away in March of 2004.
I thought I would share it here.
Mama......Tommy, Angie, myself and the grandkids all miss you so much and were blessed to have you as our mama and grandma. Sleep with the Jesus and the angels, and we'll see you in Heaven someday.
Monday, 20 April 2009

Just wanted to show off my newest creation which I made using a beautiful new scrapkit by Seachell. Thank you so much for all the wonderful shares you give us and for sharing of your time and talents with all of us psp addicts.
You can find the wonderful kit I used at
http://seachellscrapz.blogspot.com/
Thursday, 16 April 2009
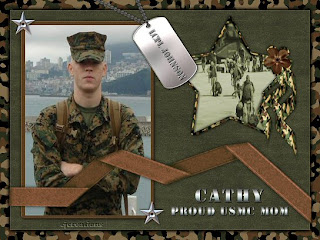
I thought that I'd start sharing some of my tag creations occasionally with you all, and since the military tribute tags are my favorites, I thought I'd start with one of those. This first one is one of my favorites because I made it as a tribute to my son Lt. Daniel Johnson USMC.
My friend Dawn keeps telling me that I should starting tut writing, and who knows, maybe someday I might surprise myself and do just that...lol
I thought maybe I'd also post a link to my group on Aimoo. We have many patriotic and military tag offers, but also have all types of copyright aware tag offers as well. Would love to have you join our friendly little online family.
http://patrioticandmilitarypsp.aimoo.com/

I've recieved another award from Dawn at
http://dawnsartisticcreationzandramblings.blogspot.com.
Thank you so very much for my award Dawn. Love ya bunches.
I think I'm supposed to pass this on to three other blogs, so here goes:
http://lafleurstuffs.blogspot.com/
http://bluedreamdesigns.blogspot.com/
http://seachellscrapz.blogspot.com/
Dawn and I will also be working on two more collaboration kits in the near future to share with you all, so please keep checking back
Wednesday, 25 March 2009
Sorry so long in posting, but real life dictates at times and there have been some really heavy things going on in my life lately.
I ask that you all pray for my oldest son Jamie. He's going through a very, very tough time right now..a life altering time, and needs all the prayers possible. Thank you all so much in advance for your thoughts and prayers on his behalf.
I'd also like to ask that you pray for my Marine son Danny during the rest of his deployment. Thankfully this time he's not in the "sandbox" but still needs those prayers.
Lastly, I'd also like to ask for prayers for my dear friend Dawn. She's scheduled to have major surgery tomorrow. Love ya girl, and pray for a a non-complicated surgery and a speedy recovery for you. We'll all miss you, so get well quick and hurry back to us (((((((HUGS)))))))
I've been trying to work on an Easter Scrapkit, so hopefully I'll be able to get it finished and up in time for Easter.
Have a wonderful week...and I promise to try to post more often!
I just wanted to thank everyone for the wonderful comments you've left on 4shared for me about my part of the scrapkit. I hope that you were able to make use of them, and that the things you make bring honor to our brave men and women in the armed forces.
Friday, 6 March 2009
All I ask is that you abide by the terms of use, and if you download, please leave me a comment. I'd love to see the creations that you make with this, so please email them to me at cat_n_mick@hotmail.com if you would.Ok here goes....lol
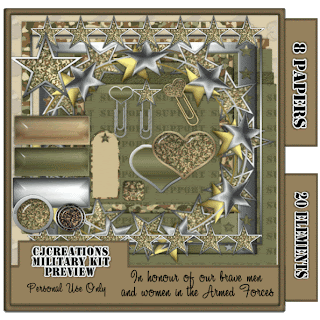
click preview for large view
You can download my part HERE
Dawn's preview and link are in the previous post
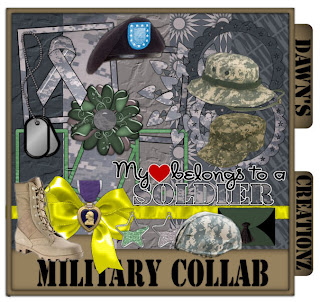
This is Dawn's part of our kit.
You can download her part from her blog
Please be sure to leave her a comment as well if you download.
http://dawnsartisticcreationzandramblings.blogspot.com/
Tuesday, 3 March 2009
have been working on a military collaboration scrapkit.
Here is the preview for my part of the kit which will be available soon for download.

My 2nd award from Dawn
The Premio Dardos award acknowledges the values that every blogger shows in their effort to transmit cultural, ethical, literary, and personal values every day. The rules are:
1. Accept the award, post it on your blog together with the name of the person that has granted the award and his or her blog link.
2. Pass the award to other 15 blogs that are worthy of this acknowledgment. Remember to contact each of them to let them know they have been chosen for this award.
(list to be posted later when compiled)
Dawn, thank you so very much for these awesome awards. It was with your encouragement that I decided to try blogging. Love ya girlfriend!
I'll post them in the order in which I received them. I'm way behind so I'm sure that everyone's already passed them all around many times to the awesome blogs around the web.
My first award:

This seal is given to the blogs, which are very charming. These bloggers, aim to find and be friends. They are not interested in self promotion. This hope is that this trophy when the links are cut, even more friendships are propagated.
I'll get my blog list together and posted tomorrow for the ones I'm passing this on to.
Tuesday, 24 February 2009
THE BUTTERFLY HAS DIED!
MSN groups, where my patriotic and military psp group has been for nearly 5 years, has finally closed down. Myself and my dear online friends have all moved on to various other sites and have reformed our groups.
Though msn is now gone, our friendships remain, stronger than ever.
A very special thank you, and all my love to my dear friends that have been there for me through thick and thin. To name a few (and there are so many more)..thank you Dawn, Kaci, Jenifer, Nadine, June, Scarlett, Kellie, Renee ( our own Soldier girl), ohhhhh there are so many more, and I love you all and thank you for your friendships.
More will be posted later on today
Thursday, 19 February 2009
I'm Cathy. I'm from a little village in North Carolina called Mountain Home, which is just outside Hendersonville, in the beautiful mountains near the Blue Ridge Parkway.
I have 8 children...5 sons and 3 daughters and 5 gorgeous grandchildren.
Currently I am living in Ireland where my "other half" is from originally.
I love Ireland, but there's no place like home...and I think my blood must run red, white and blue...and filled with stars and stripes.
One of my sons is currently serving in the U.S. Marines and is deployed at this time, though thankfully not to a war zone this time.
I love our troops and am so grateful to them for their service to our country, and for their many sacrifices every single day. They are REAL heroes. It's not the movie stars, or football players, etc who are heroes...it's these brave men and women who leave home and family, and put their lives on the line every single day, to secure the freedom that we as Americans hold so dear.
Now...about me and how I keep myself busy...LOL
I've been doing psp for over 6 years now and have had my own group on msn for most of that time...making tags to offer, and trying to help others learn to make them as well. It's been a joy to me to try to help someone learn, and then over the years watch them really showing their true talents, and branching off in all sorts of directions.
My group on msn has been a Patriotic and Military PSP group...which is moving to Aimoo since MSN is closing down groups this coming Saturday. I've enjoyed such wonderful friendships with the women who've joined my group over these past years, most of whom are military wives. We've not only enjoyed psp together, we've laughed and cried together and been there for each other during the long and lonely deployments. These military wives are true heroes as well in my eyes.
Over time, I hope to add scrapkits and maybe even branch on to doing tutorials finally.....but for now, let's see how the blogging goes, as this is my first time trying one. Please be gentle with me, and leave me some love....LOL
